Code 3 Lead
 Code 4 Lead
 Code 5 Lead
 Code 6 Lead






Lead Flashings To Chimneys


Lead Flashings To Chimneys
Selecting the right lead flashing for your chimney depends on several factors, so a one-size-fits-all answer isn't possible. However, we can guide you through the key considerations to help you choose the appropriate type:
All of the images in this post are courtesy of The Lead Lads and GNR Roofing Services.
Types of Lead Flashing to Chimneys:
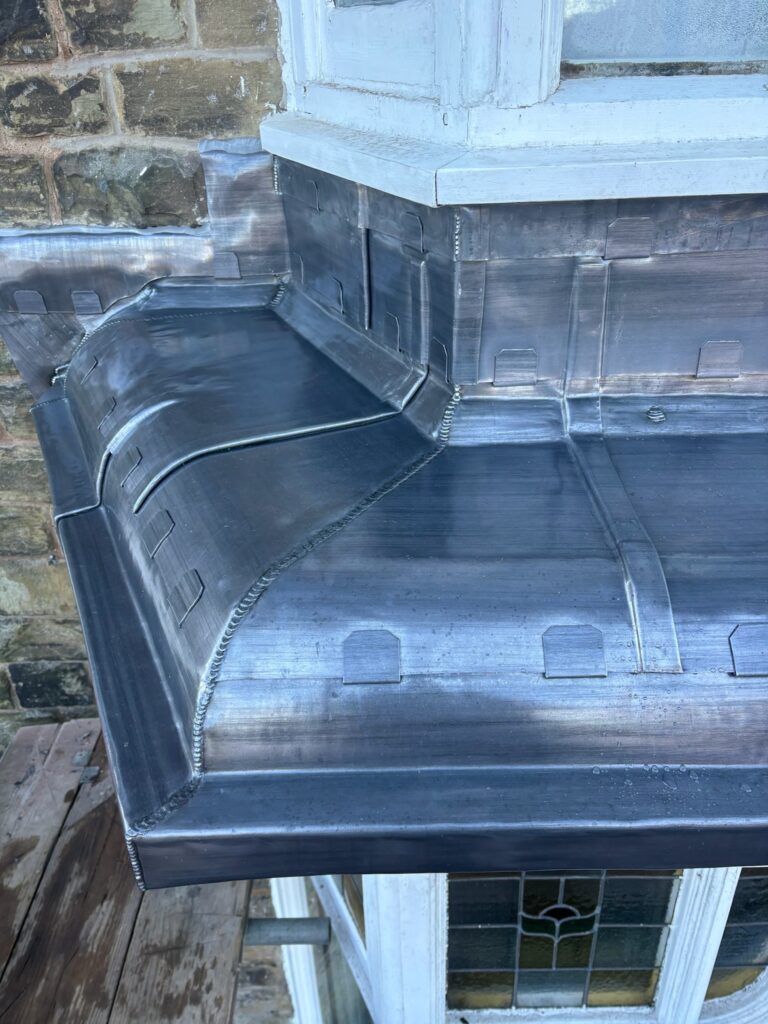
Wall Flashing: This flashing extends up the wall and overlaps the roof tiles, creating a watertight seal between the chimney and the roof.
Properly installed wall flashing plays a vital role in protecting your home from water damage. Here's why it matters:
- Prevents Leaks: Wall flashing acts as the first line of defense against water intrusion. It channels water away from the wall and into the gutter system, preventing it from seeping under the roofing materials.
- Protects Roof Structure: Uncontrolled water infiltration can lead to rot and decay of the underlying roof structure, leading to costly repairs.
- Extends Roof Life: By preventing water damage, wall flashing helps your roof perform optimally for a longer lifespan.
- Improves Aesthetics: A well-installed wall flashing creates a clean and finished look where the roof meets the wall, contributing to the overall curb appeal of your home.
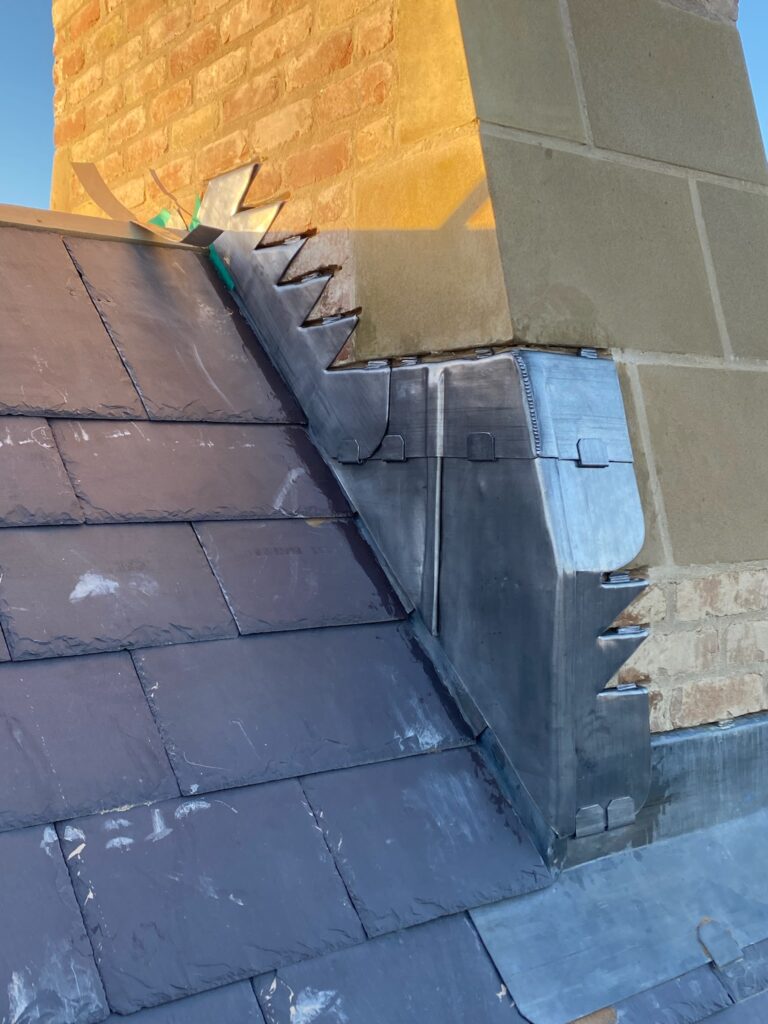

Apron Flashing: This flashing sits horizontally at the base of the chimney, directing water away from the wall and into the roof gutter.
The Role of Apron Flashing:
Imagine water cascading down a sloping roof and reaching the point where it meets the wall. Without proper protection, water could seep under the roof covering and into the wall cavity, leading to a host of problems like mold growth, rot, and structural damage. This is where apron flashing steps in:
- Water Deflection: The apron flashing acts like a shield, deflecting water away from the wall and directing it safely into the gutter system. It's typically installed with a slight upward slope towards the roof to ensure proper water flow.
- Bridging the Gap: Roof materials like shingles or tiles may not create a perfect seal at the wall junction. Apron flashing bridges this gap, creating a watertight barrier and preventing water from infiltrating beneath the roof covering.
- Accommodating Movement: Roofs expand and contract with temperature changes. Apron flashing allows for this natural movement while maintaining a watertight seal.
Step Flashing: These individual flashing pieces are installed around the chimney steps (where the roof meets the chimney at an angle). They interlock with the wall flashing and apron flashing to create a complete water barrier.
The Master of Complexities:
Unlike its simpler cousin, apron flashing, step flashing tackles a more intricate challenge. Here's why it's essential:
- Conquering Uneven Terrain: Roof tiles or shingles rarely create a perfectly flat surface where they meet the wall. Step flashing addresses this by creating a series of "steps" that interlock with both the roof covering and the wall, filling any gaps and preventing water from sneaking through.
- Flexibility for All: Step flashing utilises individual pieces, each meticulously formed to conform to the specific contours of your roof and wall. This adaptability ensures a watertight seal, even on complex roof shapes.
- Weathering the Storm: Step flashing is typically crafted from durable materials like lead or copper, offering exceptional resistance to rain, snow, and harsh weather elements. They are designed to last the lifespan of your roof, offering long-term protection.

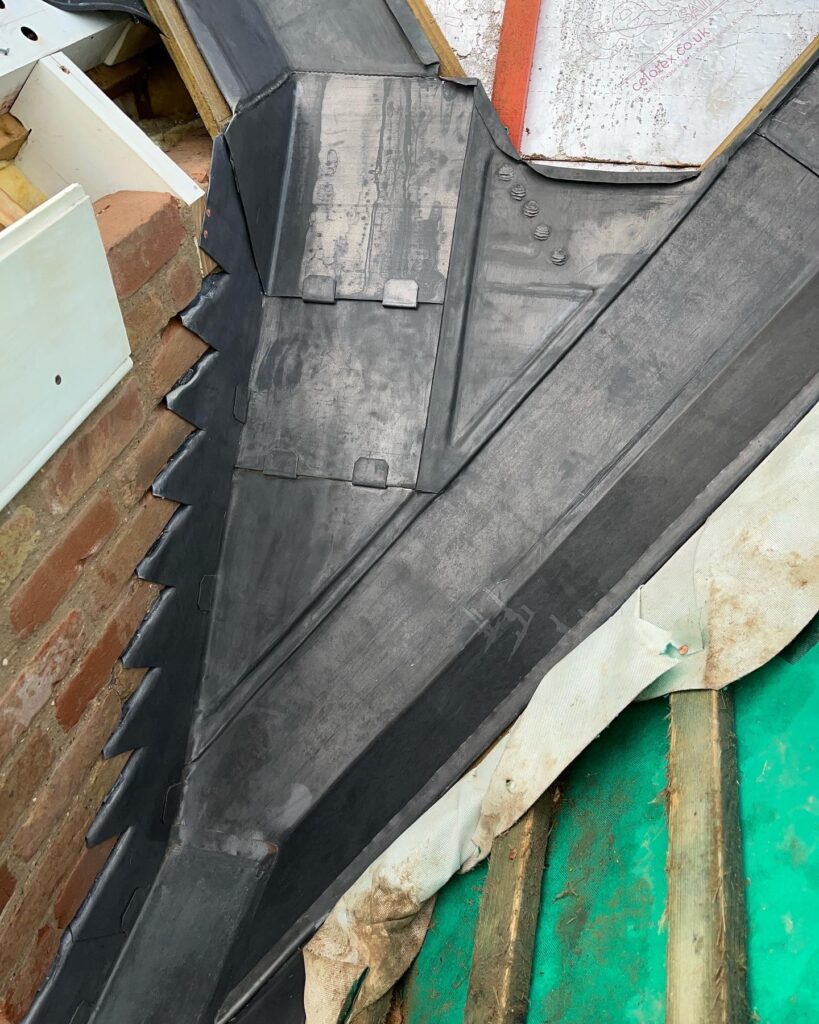
Valley Flashing: If your chimney has a valley where two roof slopes meet, you'll need valley flashing installed alongside the step flashing for added protection.
The Importance of Valley Flashing:
- Waterproofing the Valley: Valley flashing creates a watertight barrier in the valley, preventing water from seeping under the roofing materials and into the underlying structure.
- Directing Water Flow: A properly designed valley flashing system channels water down the valley and towards the gutter system, ensuring efficient drainage and preventing pooling. Pooling water can lead to leaks, rot, and even structural damage.
- Valleys should be installed with return welts and are usually lead welded at the bottom where they interface a gutter.
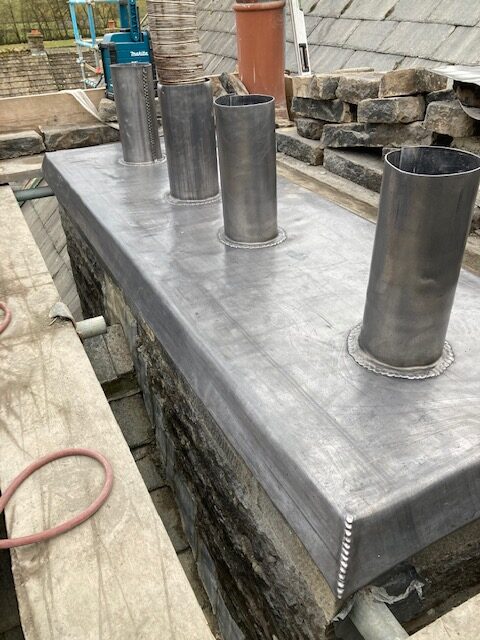
DPC (Damp Proof Course) Tray: This flashing sits just above the flashing to prevent moisture penetrating the stack, it should be continuous and have an external drip edge. Remember, masonry is often porous, such lead trays form a water stop at a critical ingress point above chimney flashings.
What is a DPC Tray?
A DPC tray is a pre-formed metal tray specifically designed to be incorporated into the chimney base during construction. It's typically made from:
- Lead: The traditional and highly durable choice, offering excellent resistance to moisture and corrosion.
- Copper: A good alternative to lead, copper provides similar benefits in terms of durability and moisture resistance.
- Plastic: A more cost-effective option, but may not offer the same longevity as lead or copper.
- Lead is the best material for forming trays, but remember to coat it with bitument and sand before building the next courses of brick or stone work off it.
- Each flue shold be welded around with an upsstand,
- Be concious of solid fuel appliances, especially open fires.
Choosing the Right Flashing:
To ensure you get the right lead flashing for your chimney, consider these factors:
- Chimney Size and Shape: The size and complexity of your chimney will determine the amount and type of flashing needed. Larger chimneys with complex shapes may require more intricate flashing details.
- Roof Pitch: The angle of your roof slope will impact the design of the step flashing pieces.
- Existing Flashing: If you're replacing existing flashing, measure the current pieces to get a starting point for new ones.
- Local Building Regulations: Building regulations may specify requirements for lead flashing materials and installation methods.
Consulting a Professional:
While lead flashing kits may be a good idea, it's highly recommended to consult with a qualified roofer or leadwork specialist for your chimney flashing project. They can assess your specific needs, recommend the appropriate types and sizes of lead flashing, and ensure proper installation for a watertight and long-lasting result.
What code of lead is most common for flashing?
In most lead flashing to chimneys application, Code 4 lead is the most commonly used material. Here's why:
- Balance of Thickness and Flexibility: Code 4 lead offers a good balance between thickness (typically 1.8mm) and flexibility. This allows it to be easily formed around complex shapes like chimneys while still providing adequate strength and durability against weather elements.
- Versatility: Code 4 is suitable for a wide range of lead flashing applications, including wall flashing, step flashing, and apron flashing used around chimneys.
- Cost-Effectiveness: Compared to thicker codes like Code 5 or 6, Code 4 offers a more cost-effective solution while still maintaining sufficient performance for chimney flashing needs.
However, there can be some exceptions depending on specific situations:
- Larger or More Complex Chimneys: For very large or complex chimney shapes, some professionals might opt for Code 5 lead (typically 2.24mm) to provide additional rigidity during forming and installation.
- Soakers: If your chimney flashing requires a "soaker" flashing (a low-profile flashing designed to absorb and disperse water) then a thinner Code 3 lead (typically 1.5mm) might be used.
While Code 4 lead is the most common choice for chimney flashing, consulting a professional is the best way to ensure you have the right material and a properly installed flashing system for your unique needs.